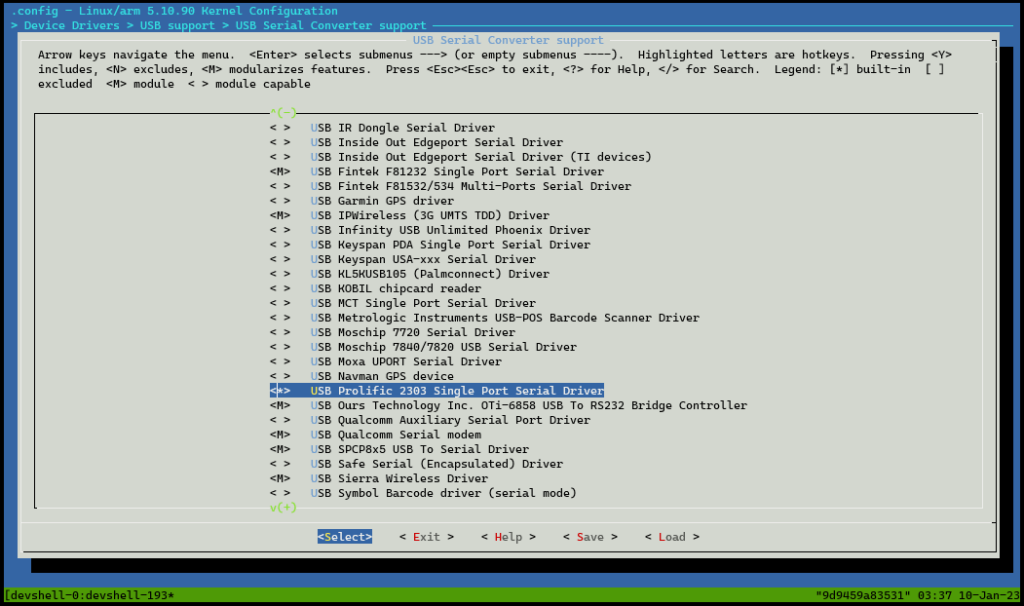
Generating a kernel configuration fragment is a common task in kernel development when working with the Yocto Project. Configuration fragments are extremely useful to define groups of kernel configuration options that you can then reuse between projects simply by adding the fragment to your kernel bbappend file.
For example, if I wanted to enable USB to serial UART device drivers via a kernel configuration fragment, I’d run through the following steps:
- Configure the kernel to setup the configuration baseline to work from
- Run menuconfig to enable/disable the desired options
- Generate the fragment by running the diffconfig command of bitbake
- Copy the fragment to my recipe overlay directory
- Add a reference to the fragment to my kernel bbappend file and rebuild
1. Default Kernel Configuration
Most all Yocto kernels are going to have a defconfig file that defines the default options for the kernel. When you run the configme command of bitbake, this defconfig will be copied to the kernel build directory as the .config for the build.
# Create a kernel configuration from the default configuration
# (i.e., build the kernel recipe through the configure step)
bitbake linux-lmp-fslc-imx-rt -c kernel_configme -fCode language: PHP (php)
2. Make Configuration Changes for Fragment
Once you have configured your kernel with bitbake, now you can edit the kernel configuration using menuconfig. Simply make all the necessary changes to the kernel configuration required for your device and save the configuration by exiting menuconfig.
# Make the necessary configuration changes desired for the fragment
bitbake linux-lmp-fslc-imx-rt -c menuconfigCode language: PHP (php)
3. Generate the Kernel Configuration Fragment
Now that you have saved the kernel configuration, the .config file in your build folder is updated with your changes. However, these only reside in your build directory and will not persist. To keep these changes around, you need to generate the configuration fragment with the diffconfig command of bitbake.
# Create the fragment
bitbake linux-yocto -c diffconfigCode language: PHP (php)
The output of this command will tell you where the fragment was stored. In my case, it was stored in:
/build/lmp/_bld/tmp-lmp/work/imx6ullwevse-lmp-linux-gnueabi/linux-lmp-fslc-imx-rt/5.10.90+gitAUTOINC+ec9e983bd2_fcae15dfd5-r0/fragment.cfg4. Copy Fragment to Kernel Overlay
Now, I can copy that configuration fragment to my directory with my recipe and add it to my recipe overlay via the bbappend.
cp /build/lmp/_bld/tmp-lmp/work/imx6ullwevse-lmp-linux-gnueabi/linux-lmp-fslc-imx-rt/5.10.90+gitAUTOINC+ec9e983bd2_fcae15dfd5-r0/fragment.cfg ../layers/meta-consciouslycode/recipes-kernel/linux/linux-lmp-fslc-imx-rt/prolific-pl2303.cfg5. Add Fragment to Kernel Recipe and Rebuild Kernel
Finally, add the fragment to the kernel recipe’s bbappend and rebuild the kernel!

# Build the new kernel!
bitbake linux-lmp-fslc-imx-rtCode language: PHP (php)
Conclusion
You can use this method to capture any group of kernel configuration options you want in a fragment. That fragment can then be reused across many projects to easily enable and disable certain kernel features.
Leave a Reply